Help me make a mask of doom
March 17, 2012 6:59 PM Subscribe
Trying to make paper mache masks (more specifically Hei's mask from Darker than Black, and other white background masks), need help on how to make it faster/more efficiently.
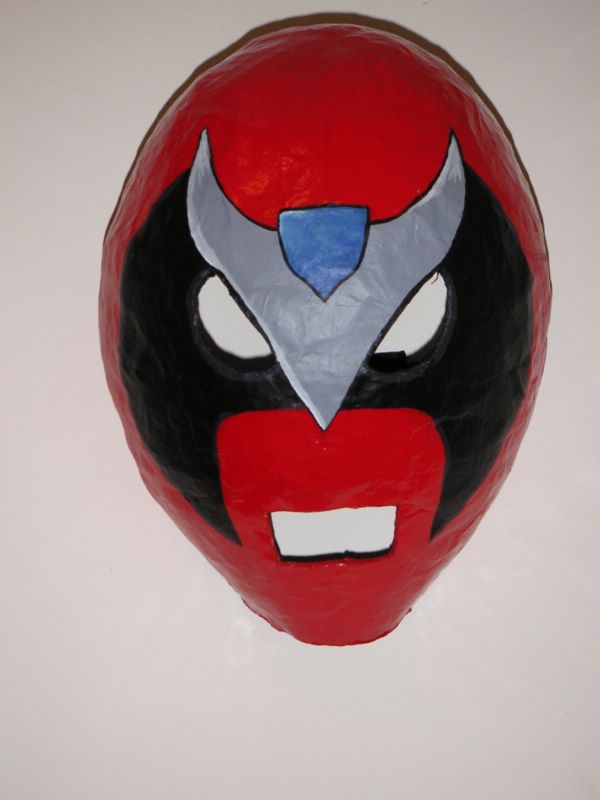
I'm going to be making a lot of masks as a hobby, but the first one I want to make is this one, which seems very easy:
Example of mask
Example 2
I have the newspaper strips ready and the paste ready (I used Elmer's paste powder which I already mixed with water). Also I have some gesso and acrylic paint with me. I had a friend give me a run down, but he's out of town for vacation and I'd hate to interrupt his fun. So a couple of questions:
1. How do I use the paste? Do I dip the strips into the paste or do use a brush to apply a layer onto my base (I'm apparently using a balloon) and apply paper?
2. Do I really need Gesso or can I just paint directly on with acrylic paint? I had a lot of Gesso leftover from a project before.
3. How should I go about making holes for the eyes so that I can see out of them? I don't want people to see my eyes, instead I want the eye parts to remain dark.
4. How many layers of paper should I use if I want a mask that I can use over and over? I don't want it to wear out after a few uses as I plan to lend this to others as well.
5. What other bases can I use other than a balloon?
Best answer: 1. Dip the strips, let soak until not-quite saturated. Depending on your newspaper that will vary - you can test it by soaking a strip and then trying to pull it apart, if it just melts in your fingers that's too much, if it still tears like paper that's not enough. You can wipe off the excess by holding the strip up above your paste vessel and with your other hand swiping down the strip with your fingers in a scissors position, if you don't want to do the drip-off thing.
2. Gesso is what makes it something that you can use over and over. So I'd say you really need gesso. Also, you can sand gesso to smoothness. That mask is deceptively difficult to recreate, because clean lines and smoothness is a lot more a matter of capable execution. Gesso will help with that. If you just go to town with acrylic paint you won't be able to start off with as smooth of a surface or end up with as simple-looking an end product.
3. Ditto fiberglass screening. Maybe also a loosely-woven black cloth? But I've seen fiberglass before and that seems to work well. Also poke-proof.
4. A bunch of layers! Let each layer dry COMPLETELY, which is more key than anything else. I'd probably go with five layers, but that might be overkill. The gesso's going to help with structural integrity and all that. Gesso the inside, too!
5. You can construct a base out of a flexible substrate, like wire mesh, that you would cover on both sides. That's for shapes that are more complex, though. A balloon will probably be perfectly fine, and then when you pop it you don't have to worry about getting the mask off of a rigid base. Get a big enough balloon that the curvature is subtle enough so the edges don't curve into the side of your face - so a balloon that's bigger than your head. The hard part will be making room for your nose.
posted by Mizu at 8:21 PM on March 17, 2012 [1 favorite]
Response by poster: I've seen people put one layer of paper mache, then crumple up a tight wad of paper in the shape of a nose, so I'll guess I'll try that.
Excellent answers, too. Now I guess I have to wait for tomorrow to start until I get that screening.
posted by Angel of Khaos at 8:56 PM on March 17, 2012
Excellent answers, too. Now I guess I have to wait for tomorrow to start until I get that screening.
posted by Angel of Khaos at 8:56 PM on March 17, 2012
For example--I made a mask on a large balloon without gesso (which, until now, I'd not known about).
I bet that's 5 layers, and, yeah, it's not very smooth, and obviously balloon-shaped, and it didn't last very long before the edges started separating. I didn't bother with screening on the eyes. Comfort was an issue--I ended up using a bandana to provide some padding on the inside face surface.
I was happy with that mask, thought it was pretty damned awesome, but it could've used some improvements.
posted by MrMoonPie at 9:06 PM on March 17, 2012
If you want your mask to fit your face, mold the paper mâché on to your face by doing the following:
- cover your skin with Vaseline or cling wrap or both (in the case of cling wrap, do not cover your nostrils
- lie down and have a friend dip the strips of paper in the glue/water mixture, and then layer them on your face everywhere except the bottom of your nostrils (this allowing you to breathe). The friend should alternate the directions of the strips (layering vertical on horizontal) for strength. I would also build up a clear border layer at the edges for strength.
- after you have 4-5 layers on, you will have a thin paper mâché plain mask of your own face. Let it dry for a bit to set, then carefully remove it. Set it out to dry completely, perhaps supported by a bowl so it maintains its shape.
- when it is completely dry and stiff, you carefully trim the outside to the desired shape and cut the desired eyeholes, and then you begin layering more paper mâché and shaping it -- adding height where you want it, smoothing out features you want to smooth out - essentially sculpting with crumpled paper mâché with smooth layers on top. Don't forget to use the paper mâché strips to line the edges of the eyeholes and the mask itself.
The advantage of making a mask based on your own face rather than a balloon or other surface (I've used a styrofoam wig head) is that the mask will fit your face (your nose, jaw, cheekbones) and you can cut eye holes that you know will line up with your own eyes.
After you have sculpted your mask, leave it to dry again, completely. after it is dry, you can sand off remaining roughness, and then paint, add fabric, etc. Paper mâché takes most paints very well.
posted by jb at 10:44 PM on March 17, 2012 [2 favorites]
looking at the design you want to do, you'll want to build up a lot around the cheeks, etc, to eliminate the nose bulge. This will make the mask very thick
Alternatively, you can use plastercine to shape that very flattened face on your face before you begin the first shaping layer. I've never done this myself, I've only done it on a plaster model of my face (the best thing for masks, but more involved) -- obviously, someone would have to do it for you.
posted by jb at 10:47 PM on March 17, 2012
oh - if you do want to make a lot of masks for yourself specifically, if is really nice to have a plaster mold of your own face.
You make a plaster mold by putting vaseline on your skin, then wrapping your face in plaster bandages. After you take that plaster bandage mask off and plug up the nose hole (which you did leave, right?), you have a bowl-mold to pour liquid plaster into - and then you can make a plaster replica of your face. Just make sure that the mold is strong to take the weight (reinforce it with more plaster bandages on the outside after taking it off).
Once you have a plaster replica of your face, you can make all sorts of masks that will fit you well. You use plastercine to design them on the plaster face, and then make them in paper mâché (with no need for the much more awkward paper mâché molding). These masks will not lie flush against your face like those made with the method I described above, but will still fit perfectly with your nose, etc. They will be lighter and more comfortable than the other method, but obviously take more time and equipment to set up the plaster mold in the first place.
posted by jb at 10:55 PM on March 17, 2012 [1 favorite]
you don't need gesso, but you may not get as smooth or as wooden looking a surface without it.
for number of strips: lots. At least 4-5 layers to get the first shaping, but you will need more like 15-20 for a strong mask. If you use thicker paper (like construction paper) you can use fewer layers, but you also have a less smooth effect (each strip sticks up more).
something much softer? then fibre glass screening for the eye holes: I have achieved that same effect with sheer (see through) black cloth, which I just glued to the inside of the eyeholes.
posted by jb at 11:01 PM on March 17, 2012
This thread is closed to new comments.
3--use black fiberglass screening from the hardware store over the eye holes.
posted by MrMoonPie at 7:11 PM on March 17, 2012