Simple construction/woodworking question
August 6, 2019 8:31 AM Subscribe
I'm going to be DIY-ing an audio rack out of wood pieces and spikes to isolate each rack. How do I ensure that the holes for the spikes are drilled in the appropriate location to match up with the discs they sit in?
This is probably better explained with some visuals, and I'm sure this is a super common technique/issue that I just don't know how to google the right keywords for since I don't do much woodworking.
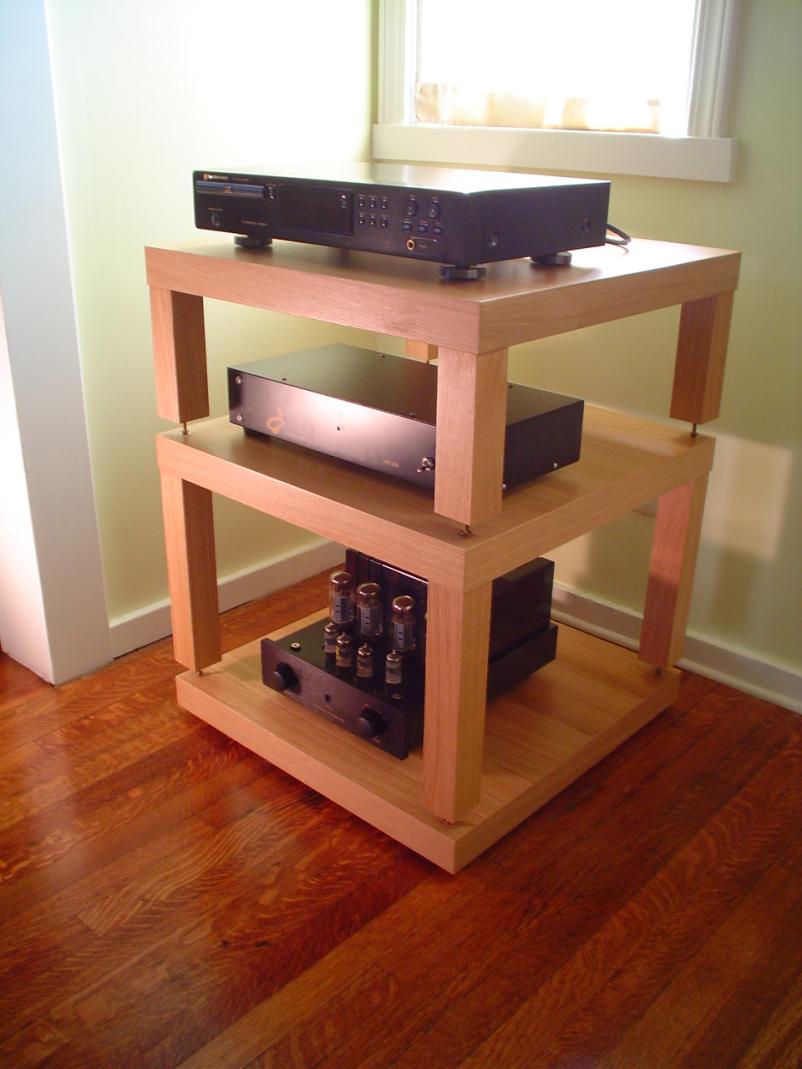
Here is what the final piece is intended to look like.
These are the spikes that will be drilled into the bottom of each leg to separate the levels. They include the spike as well as the disc that the spike sits in, which should be attached to the surface below it.
How do I make sure that each part is attached exactly where it needs to be, so the spike sits precisely in the disc divot?
This is probably better explained with some visuals, and I'm sure this is a super common technique/issue that I just don't know how to google the right keywords for since I don't do much woodworking.
Here is what the final piece is intended to look like.
These are the spikes that will be drilled into the bottom of each leg to separate the levels. They include the spike as well as the disc that the spike sits in, which should be attached to the surface below it.
How do I make sure that each part is attached exactly where it needs to be, so the spike sits precisely in the disc divot?
Response by poster: I honestly don't either. I think they might be freestanding (normally you'd just place them on the floor, I think?) so I was thinking of gluing them on the surface of the wood so there's no sliding.
posted by rachaelfaith at 8:49 AM on August 6, 2019
posted by rachaelfaith at 8:49 AM on August 6, 2019
A tool exists called DOWEL Centers. Drill a hole, place the dowel center and use the sharp point on the dowel center to transfer the location to the other point where you need to locate either the other hole spot or to mark the location onto masking tape to mark the locations for all 4 per level correctly. Wood crafty sites have there.
posted by Freedomboy at 8:57 AM on August 6, 2019
posted by Freedomboy at 8:57 AM on August 6, 2019
You could also put the disks down, put a piece of masking tape on each disk with the sticky side facing up. Put a pinhole in the tape where each divot is. Place the upper level down so that the tape sticks to the bottom of each leg, then drill where the pinhole is. I'm not sure how much tolerance is in each spike/divot though.
posted by bondcliff at 8:59 AM on August 6, 2019
posted by bondcliff at 8:59 AM on August 6, 2019
The instructions don't mention the feet - which appear to just be using two sided foam tape. I think bondcliff has it with the second option.
posted by zenon at 8:59 AM on August 6, 2019
posted by zenon at 8:59 AM on August 6, 2019
Best answer: If it were me, I'd attach the spikes to the legs and then use the spikes to punch the center points of where the discs should go. Then I'd use a brad-point drill bit of the same diameter as the discs to very slightly countersink them for additional stability.
posted by supercres at 9:06 AM on August 6, 2019 [1 favorite]
posted by supercres at 9:06 AM on August 6, 2019 [1 favorite]
I think you've got this wrong.
The spikes are speaker spikes which are used to bond your speakers to the floor (even through carpet).
I think you need an isolation kit to isolate your components from vibration from your speakers which can cause feedback effects ( and probably other effects, which someone who is more knowledgable can explain).
I'm not an expert, but I think you only need to isolate turntables, cd players, dvd players. I think you can build the rack and only put isolaters on individual components that need it.
posted by H21 at 9:35 AM on August 6, 2019 [1 favorite]
Best answer: How do I make sure that each part is attached exactly where it needs to be, so the spike sits precisely in the disc divot?
Follow the manufacturer's installation instructions to get the spike feet installed into the bottoms of the legs. Before drilling the hole that accepts the threaded insert that comes with the feet, find the exact centre of the underside of the leg by ruling a pencil X across the corners.
Pay a lot of attention to making sure you're drilling parallel to the leg. Those spike feet will look bad if any of them end up with a tilt.
Once the spikes are in the legs, it's time to fix the support discs to the top of the surface they'll rest on. Stick the double sided foam adhesive to the bottoms of the support discs, but leave the waxed paper protection layer attached to the bottom of the foam so it can't stick itself to the underlying surface before you've worked out exactly where it should do so.
Put the discs down roughly where the spikes should go, then lower the top piece onto them and joggle the discs until the spike tips are in the divots. Next, slide the discs around until the top piece is sitting exactly where you want it to end up.
Having lined it all up, put a bit of weight on the top piece to stop it moving even a tiny bit while you get a pushpin and prick three very tiny pinholes into the surface the discs are sitting on, spaced fairly evenly around each disc, right against the edge where the waxed paper is stopping the foam tape from sticking.
Also put a tiny Sharpie dot on the edge of the disc right next to one of its pinholes, so you know how to orient that disc with respect to its pinholes after peeling the waxed paper off the bottom. In theory they're perfectly circular and the foam tape is perfectly centred on them so the Sharpie dots are not necessary, but in theory there's no difference between practice and theory.
Pinholes are a much more precise way to mark a position on a surface than pencil marks.
posted by flabdablet at 9:35 AM on August 6, 2019 [1 favorite]
A simple drill template will solve your problem, since each hole needs to be in the same place in relation to the corners and edges. I made one out of cardboard when installing cabinet knobs on several identical doors.
You need a square or rectangle of cardboard with a clean-cut corner, and edges long enough that you can easily line them up against your shelf corner. With a nail or other sharp object, make a hole in the cardboard where you'll want to drill. Place and hold this cardboard exactly at the corner of your work piece and use a pencil or nail to mark the location for drilling.
I know it must be hard to picture; here's a page with photos that make it clearer.
posted by wryly at 9:50 AM on August 6, 2019
Response by poster: I have isolation feet for under the turntable, which will sit on the top shelf. The spikes are to separate the rack shelves, which is what I was advised to buy. I'm working off a few loose build guidelines from around the internet.
posted by rachaelfaith at 9:53 AM on August 6, 2019
posted by rachaelfaith at 9:53 AM on August 6, 2019
bondcliff's first suggestion is how I'd do it, but I'd be pretty leery of stacking expensive gear on something supported only at four points by those particular spikes, let alone on two levels - looks to me like a good way to end up with a piece of gear on the floor.
The resolution isn't great, but the piece of furniture in that image appears to be using a bolt/nut-type assembly rather than the tapered spikes from the link or the isolation spikes linked above.
I think you only need to isolate turntables, cd players, dvd players.
For vibration, this also my understanding, although these particular spikes seem to be intended for decoupling speaker cabinets. For heat, it's a good idea to give each component some space, especially if you're dealing with tubes.
posted by aspersioncast at 9:48 PM on August 6, 2019
This thread is closed to new comments.
If the disks get attached into drilled holes:
Put the spikes in first. Then sit the second level on the first level. If the spikes aren't sharp enough to mark holes in the wood, put some pencil graphite or chalk on the tips.
Put the disks where the marks are.
If the disks are just stuck on:
Install the spikes. Place a disk under each spike and position it where you want it. Draw a circle around each disk and install the disks where the circles are.
It's entirely possible I don't fully understand how the disks work.
posted by bondcliff at 8:44 AM on August 6, 2019 [2 favorites]