DIY Photography Lighting for Paintings and Glassware
July 14, 2016 7:01 AM Subscribe
I need to photograph a new batch of paintings and painted glassware for Etsy. In the past, I've hired photographers to do this, but right now I can't find one. I like the idea of doing it myself anyway. I don't want to invest in full-on photo lighting. I know I could rent some online, but I have a feeling that with ingenuity and Home Depot, I could hack something together. More inside.
I'm not sure what details matter, so I"ll give a lot. My paintings are mostly around 9 x 12 or so, a lot of ink, watercolor, and alcohol ink. I also have small painted glassware (candle holders, mugs, etc.) that I want to photograph. I don't own the white box that I've seen used for product photography before.
For each piece I photograph, I will be taking a close-up that fills the frame, one farther back showing the piece on an easel (or on a table for the glassware). I also want to get very close-up detail shots for each piece.
I'll be doing this on my glassed in sunporch, which gets a lot of natural light. I have a small table near a south-facing door where I set up the easel. I hang a white sheet to eliminate glare and give a better background.
If I were to hack together lighting based on what I can get at a box store (we don't have IKEA, but Home Depot, Pier 1, Bed Bath and Beyond, Best Buy, Target, Lowe's), what should I buy? What properties do I need to look for, and what's a good bulb brightness range? What's the best way to position them? I've read that, if I use two lights, I should keep them equidistant from the subject so it gets equal light from both, but I don't know if that's true or if there's more to it.
Finally, I'm trying to think of the best/cheapest way to stage the glassware. I'm wondering if white posterboard that I illuminate well will do the trick. I welcome all ideas.
Best answer: Google "DIY product photography" you'll find many ideas you can get started with what you already have, or can get from a craft or hardware store.
posted by dorkydancer at 7:11 AM on July 14, 2016 [1 favorite]
posted by dorkydancer at 7:11 AM on July 14, 2016 [1 favorite]
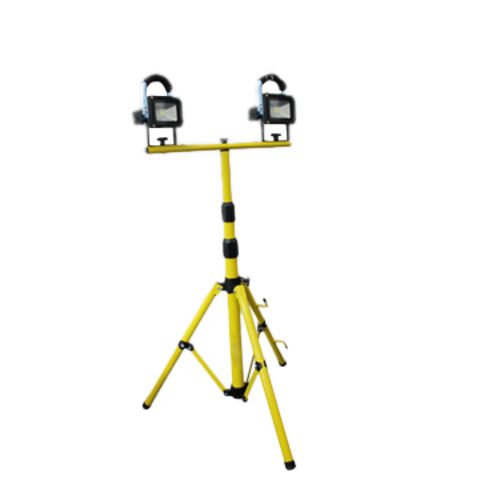
Lots of smaller eBayers/Etsyers have found 'construction'/'job site' lighting, like this, to be a boon. (Also agreeing with waiting for a sunny day.)
(It is cheap and bright but I would suggest avoiding the shorter and more portable construction lighting -- this kind -- as it is hard to find a good place for them, I found. You'll end up having to rig up something to hold them at the right height.)
posted by kmennie at 7:36 AM on July 14, 2016
(It is cheap and bright but I would suggest avoiding the shorter and more portable construction lighting -- this kind -- as it is hard to find a good place for them, I found. You'll end up having to rig up something to hold them at the right height.)
posted by kmennie at 7:36 AM on July 14, 2016
I made one of these light boxes back when I did food photography and it worked like a charm.
posted by weeyin at 8:00 AM on July 14, 2016 [2 favorites]
posted by weeyin at 8:00 AM on July 14, 2016 [2 favorites]
Best answer: Given the size of your product, I think you could easily bodge together a cheap light box out of paper and cardboard or foamcore for $15 or less. There are a lot of tutorials online for this.
posted by The Elusive Architeuthis at 8:37 AM on July 14, 2016 [1 favorite]
posted by The Elusive Architeuthis at 8:37 AM on July 14, 2016 [1 favorite]
Best answer: The flexible clip lamps like in weeyin's link are pretty good, but instead of building a light box, you can buy a translucent plastic storage tub, which you can insert your white backdrop poster board into, and the plastic tub itself can act as a diffuser. You can store the lamps, power strip, extension cord, backdrop, and so on in the plastic tub when not in use.
Doesn't really help with the easel shots of your artworks, but it creates a neutral, controllable light space for product shots.
posted by Mister Moofoo at 8:51 AM on July 14, 2016 [1 favorite]
Doesn't really help with the easel shots of your artworks, but it creates a neutral, controllable light space for product shots.
posted by Mister Moofoo at 8:51 AM on July 14, 2016 [1 favorite]
Response by poster: These ideas are great! Thank you. I'm excited to play with them.
I like the suggestion of the work lights. I checked Home Depot's site and found some that look like they may work. @kmennie or anyone else who knows, when using light like that are there any tips about how to position it? I don't know if it needs to be close or far or if it all depends on the painting and on what light is already available.
posted by mermaidcafe at 8:57 AM on July 14, 2016
Aiming the light directly on your item might be a bit strong, particularly with a work light. You could aim it at white wall and "bounce" the light. It will be more diffuse, and give you less shadows. If you need to fill, you could use a white foam core board as a bounce board and aim it where you need it.
Pinterest list of lighting diagrams
Brighten your product photography with bounced light
posted by dorkydancer at 9:17 AM on July 14, 2016
Pinterest list of lighting diagrams
Brighten your product photography with bounced light
posted by dorkydancer at 9:17 AM on July 14, 2016
If you can, get a copy of Light -- Science and Magic; specifically chapter 7, which deals with shooting glass. The book also covers how to shoot paintings. The $17 you spend is worth every penny, and it'll answer just about all your questions.
And yes, how far you place your lights from the object you're shooting is going to vary wildly, depending on your object, room size, power of the light, etc.
posted by culfinglin at 4:05 PM on July 14, 2016 [2 favorites]
And yes, how far you place your lights from the object you're shooting is going to vary wildly, depending on your object, room size, power of the light, etc.
posted by culfinglin at 4:05 PM on July 14, 2016 [2 favorites]
This thread is closed to new comments.
posted by sammyo at 7:08 AM on July 14, 2016