Blender materials, what am I missing?
July 5, 2012 12:32 PM Subscribe
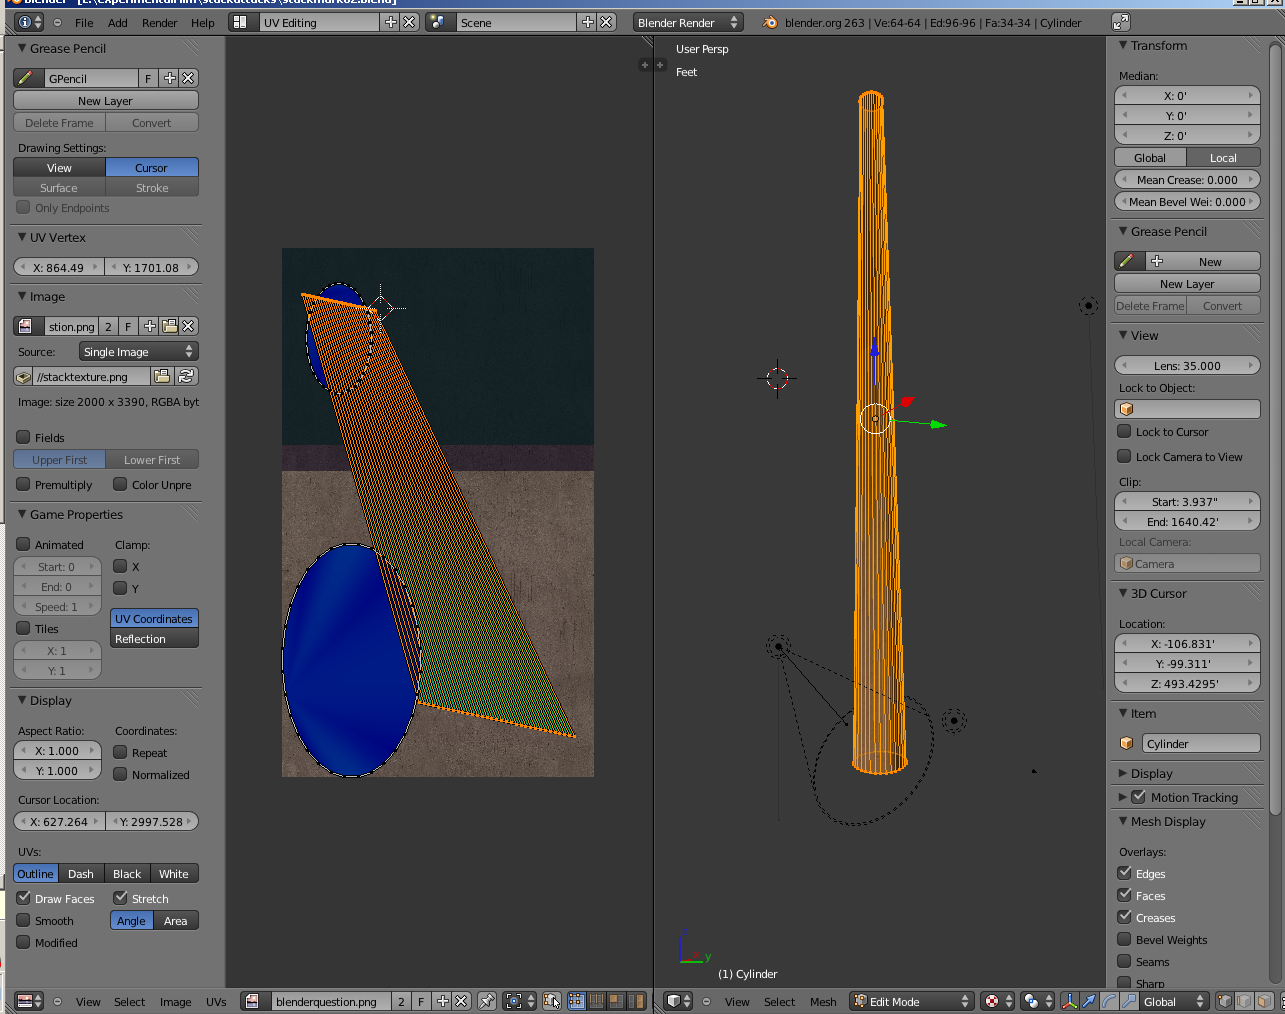
I've tried yet again to tackle learning Blender, and yet again, I'm stuck on what should be a basic simple thing. Adding a material to an object. Can someone get me unstuck?
Here's a screen capture for reference.
I've tried some Youtube tutorials, but they're using an older version of Blender which makes it difficult to follow along. I've read the manual but whatever I'm doing wrong I don't think it's addressed there.
I have viewport shading set to texture. It's just showing up black, so the obvious thing to check is lighting, but I have Environmental Lighting checked and that doesn't seem to make a difference, and neither does adding a point light.
Environment Lighting doesn't do anything until you render. It doesn't show in real time in the viewport. Does it look black from every single view? Because if you're not facing the light source dead-on it won't show the texture very clearly.
Also, the 3D viewport isn't going to show Normal mapping (unless you have Normals and Bumps mapped from external images via UVs, which I haven't done myself, but have seen other people do). You have to render for that, too.
posted by overeducated_alligator at 1:30 PM on July 5, 2012
Also, the 3D viewport isn't going to show Normal mapping (unless you have Normals and Bumps mapped from external images via UVs, which I haven't done myself, but have seen other people do). You have to render for that, too.
posted by overeducated_alligator at 1:30 PM on July 5, 2012
Best answer: You'll probably find it shows up ok if you render (F12). There's no way to get anything other than a UV mapped bitmap image to show up in the viewports as far as I know unless you use GLSL or Cycles which would probably just make life complicated when learning.
In my experience you have to manually select the texture you want to use in the UV editor (and it will only show "image or movie" type textures) and also at least create a UVMap.
I'm not sure if these instructions will help, it's probably a bit hard to follow along without screenshots, but what the hell I've typed them now...
And here's some random tips:
posted by samj at 2:06 PM on July 5, 2012
As overeducated_alligator says, environment lighting doesn't show in the viewport. You should disable all that stuff and just use a basic lighting setup when you're working on materials. If I were you, I'd set this scene aside and just get a material to render on the default cube using a single light before trying to debug your current .blend.
So, work on this, on the cube only:
1. Get the most basic material to render--a color, specularity.
2. Get a UVMapped texture to render. (samj's instructions are good.)
3. Get a material to render using environment settings. (In this simple render using the Blender Internal Renderer, for example, I've got a low-poly spider model with the wireframe rendered as its texture, one light, a plane set to catch shadows but be otherwise transparent, and some environment settings.)
Once you can do those things, you'll be able to fix your scene. I highly recommend the tutorials at Blender Cookie. The majority use the post 2.5 interface.
posted by xyzzy at 5:59 PM on July 5, 2012
Response by poster: Okay, it does show up when I render. That had not occurred to me.
I've also managed to follow samj's instructions on a cube, and then on my original model, and it works as described. I was originally planning to knife the model into sections and then apply different textures to each face, but the bitmap approach might open up other tactics.
Thanks very much, everyone. I might be able to stick with it until I get competent, this time. At least I'll make it through this one project.
posted by RobotHero at 6:45 PM on July 5, 2012
Keep plugging away at it--if you can get Blender, you can easily translate that knowledge to commercial packages like Maya or 3DSMax with no trouble. :)
posted by xyzzy at 7:38 PM on July 5, 2012
posted by xyzzy at 7:38 PM on July 5, 2012
This thread is closed to new comments.
posted by sebastienbailard at 12:51 PM on July 5, 2012